

Putting together an emergency kit does not have to mean buying a bunch of new gear. With a bit of imagination and a quick walk through your pantry and storage closet you can build an effective kit using items you already own. This article breaks down simple steps to turn household scraps and spare supplies into tools and storage that perform in a real event.
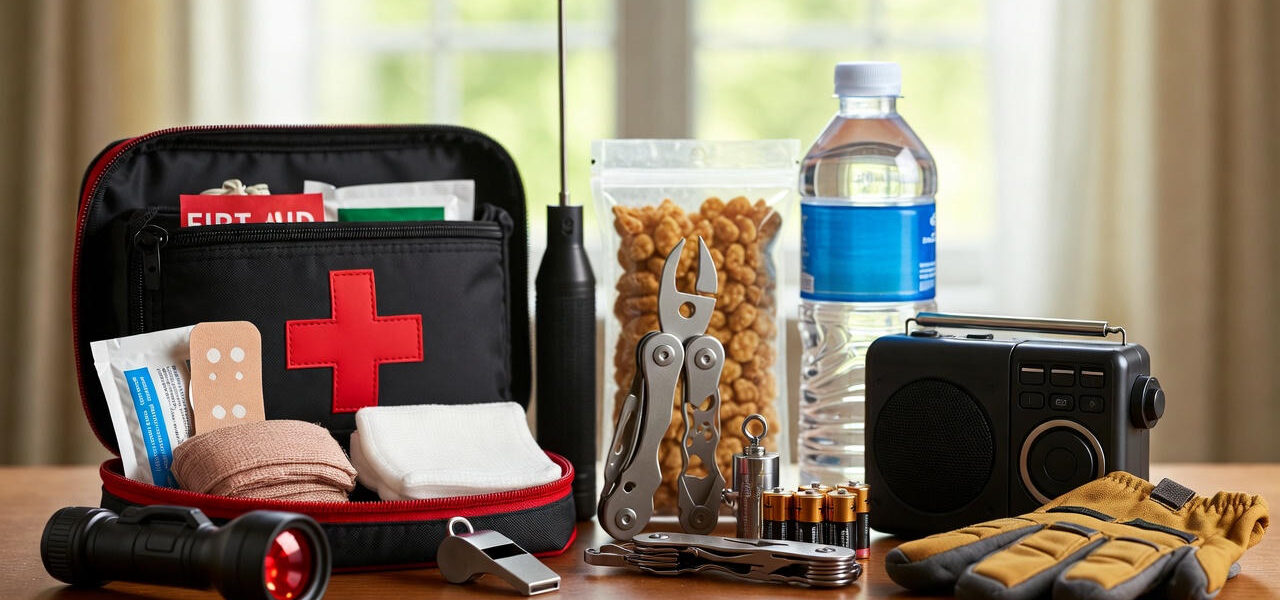
Every kit should focus on the basics of shelter, water, food, first aid, communication and light. The goal here is to use common materials with small upgrades to make these essentials last and work better when they are needed most. Read on for hands on examples, packing tips and a clear checklist you can follow today.
How To Build An Emergency Kit With Upcycled Household Items
Use this plan as a step by step path. Start by pulling together containers and supplies you already own. Then group items by function and make small modifications that extend life and usability. For many people a full kit can be assembled in a couple of hours without any special purchases.
Before you begin sort items by condition. Throw away expired food and worn out batteries. Clean containers and label everything with the date you packed it. With a few low cost repairs and smart packing each object will perform better under stress.
Why upcycled items make smart emergency supplies
Reusing what you have can be faster and less expensive than a store run. Many common products are durable and multi purpose. For example plastic storage tubs, glass jars and sturdy backpacks were designed for repeated use so they already meet the needs of a kit. Small alterations like waterproofing seams or adding reflective tape extend their function without much effort.
There are many detailed projects and inspiration pages that show specific conversions and patterns. For those who want step by step plans check resources like Upcycle That for ideas that match the supplies in your home. Use the examples there as a springboard and adapt what you learn to the objects you already own.
Essential supplies to include using items you already have
Think in categories and include redundancy for critical items. Below are practical choices and ways to adapt household items to serve each function. Each list includes a quick tip to increase lifespan or safety.
First aid and sanitation
- Bandages and gauze Use clean fabric cut from an old cotton shirt as extra dressings. Store fabric inside a resealable plastic bag to keep it dry.
- Wound care Keep an antiseptic such as hydrogen peroxide or alcohol wipes. Old pill bottles can be used to carry small amounts of liquid if washed and labeled.
- Gloves and masks Use disposable gloves where possible. When none are available, double layer plastic bags for a barrier in non medical situations.
- Sanitation supplies Empty shampoo or soap bottles can be refilled with concentrated hand soap for a compact hand washing station.
Food and water management
- Water storage Reuse clean 2 liter soda bottles as emergency water containers. Fill to the brim to leave less air space and store in a cool dark place.
- Water purification Add small packets of household chlorine bleach to a resealable bag and label instructions for use on the outside in permanent marker.
- Non perishable food Canned goods are perfect. Remove sharp edges from cans and pack a manual can opener sealed in a small container.
- Cooking improvised stoves Convert an empty tuna can and a scrap of cotton cloth soaked in rubbing alcohol into a small single use stove for boiling water outdoors. Practice once to learn burn time and safety distance.
Creative storage and organization with recycled containers
Good organization keeps small items from being lost and makes the kit usable under stress. Use sturdy containers that seal well and label everything clearly so that anyone can find items quickly.
Container ideas and modifications
- Backpacks Turn a spare backpack into a grab bag by reinforcing the bottom with duct tape and sewing or gluing an extra layer of fabric if needed.
- Plastic tubs Use clear plastic bins for household kits. Add weatherproof lids and line the bottom with a thin foam sheet cut from old packaging for shock protection.
- Glass jars Small screws and batteries can be stored in glass jars with tight lids. Wrap a band of bright reflective tape around the outside to make them easy to spot.
- Old lunch boxes and coolers Reuse insulated lunch boxes to hold cold packs or medications that need to stay cooler for short periods.
Label containers with the date packed and a short contents list. Use large handwritten tags for quick scanning. For family kits, include a printed card with emergency contact numbers and basic medical information for each household member.
Tools and lighting from common household parts
Many tools needed in an emergency can be improvised from existing items. The goal is functionality and reliability so test each item before you depend on it.
- Flashlights and lanterns Store multiple small LED flashlights from empties or sale items. Replace batteries every six months and keep extras in a labeled pouch.
- Candles Make candles by melting leftover candle stubs into clean jars
- Hand crank alternatives If you have no crank radio, use a small windup or battery powered radio. If neither is available consider a small battery bank made from rechargeable batteries and a USB adapter kept fully charged.
- Multi use tools Use a sturdy kitchen knife, a pair of pliers and a wrench. Old belt loops or nylon straps can be converted into tourniquets if needed but practice safe use ahead of time.
Packing checklist and maintenance routine
Create a simple checklist and put it inside the main kit container. Check items at least twice a year and replace expired foods and used medical supplies. Rotate water containers and top them up to keep storage fresh.
- Monthly quick look Batteries, light sources and seals on containers
- Every six months swap perishable supplies and test fire suppression items
- Once a year do a full inventory and update emergency contact cards
Keep a smaller day bag version of the kit that you can grab for short evacuations. This should include water, a basic first aid set, a flashlight and a laminated list of family contacts and meeting points.
Safety tips and testing your kit
Practice makes a kit useful. Run a family drill that includes locating the kit and using key items like the makeshift stove and water purifier. Test batteries and lights in the dark to confirm they provide enough illumination. Wear gloves and eye protection when testing any open flame or improvised tool.
Store hazardous materials in childproof containers and label them clearly. Keep all kits out of direct sunlight to reduce degradation from heat. For medication or special medical needs keep a separate list of dosages and refill dates so there is no confusion in a stressful moment.
Customization ideas for special needs and pets
Adjust your kit for ages and medical conditions. For infants pack formula, spare bottles and a small sterilizing kit. For older adults include extra prescription dosages and a copy of recent medical history. For pets include food, a leash and a small collapsible bowl.
- Include a list of local emergency shelters and their pet policies
- Keep copies of vaccination records in a waterproof bag
- Store medication in labeled containers with clear dosing instructions
Label kits for specific people if needed so that caregivers can quickly identify which bag belongs to who. A simple color coded tag system is helpful when multiple kits are stored together.
The key to a usable emergency kit is practicality and repeat use. Using items from around the house means the kit reflects what you already own and can be updated without a large outlay. With careful labeling and a short maintenance routine your kit will be ready when it matters most.
Putting together a well organized emergency kit using repurposed items saves money and shortens the time to readiness. Start with the essentials water food and basic medical supplies then expand outward to include lighting, tools and documentation. Test the kit and practice a family drill to build familiarity with the contents and their operation. Keep a small day bag for quick departures and a larger home kit for longer stays. Update supplies on a calendar and replace expired items regularly. Now is a great time to gather containers and check closets for reusable parts. Pull the items into one place this weekend, follow the checklist above and label each container clearly. When you finish share your kit list with family members and store contact information inside the main bag. Taking these practical steps will make your household more prepared with minimal cost and effort.